

Manual Installation Instructions
The SolveFX Utility is a standard Excel Add-In file (*.xlam) that can be installed following the same process as any other Excel Add-In. These instructions can also be used if upgrading to a new version of the Utility. General Information on installing Excel Add-Ins. For more information, please refer to the SolveFX Technical Guide.
Download a free copy of the latest SolveFX Utility (file: “SolveFXUtility.zip”) to your local machine. After the latest SolveFX Utility (file: “SolveFXUtility.zip”) is downloaded to your computer, it will be located in your Downloads folder as shown below.
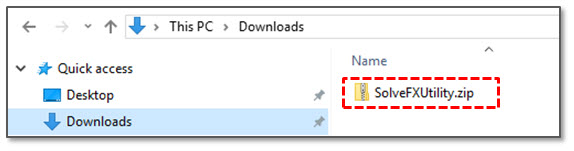
Location of Solvefx utility
Next, extract the SolveFXUtility.zip file to a new folder. For example, extract the .zip file to a folder called “SolveFXUtility” within your Downloads folder as shown below. IMPORTANT - The SolveFX_Installer.xlsm should not be opened and run from within the .zip folder as installation will fail. You must extract out or copy the two files listed below to a different folder than the original .zip folder and then open the SolveFX_Installer.xlsm to successfully install.

extracted solvefx ultility folder
After the file “SolveFXUtility.zip” is extracted to a new folder, there will be 2 files contained within the folder as shown below.

extracted files
It is recommended that you then take the following steps if using Microsoft Office 10 or later.
If you are using Office 10, then will need to modify the properties of the downloaded SolveFX Utility file (SolveFXUtility.xlam). In 2016, Microsoft released a new feature called "Protected View" which blocks Office files and add-ins downloaded from the internet from loading automatically. To unblock the SolveFX Utility, take the following steps:
Right click on the downloaded SolveFXUtility.xlam file
Check the Unblock checkbox in the Security areas of the Properties window
Click Apply
Click OK
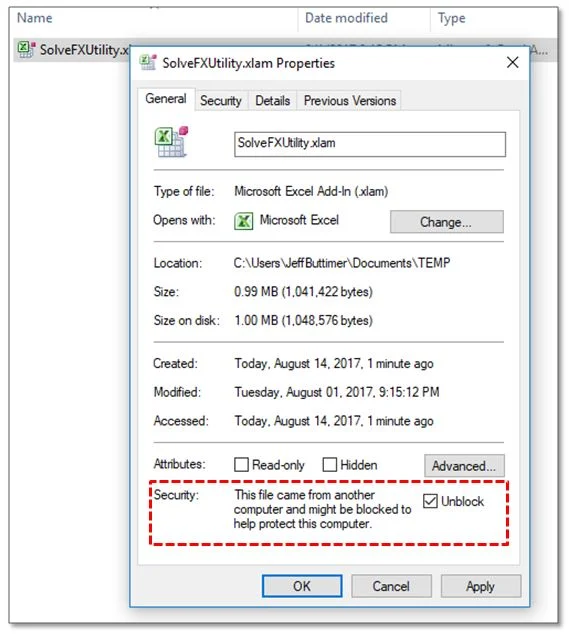
security unblock feature screenshot
Move the “SolveFXUtility.xlam” file to any folder on your local machine.
Option 1: Create a folder called “SolveFX” and move the “SolveFXUtility.xlam” file to this location. As new versions of the utility are available, simply copy the new version of the add-in into this consistent location replacing the prior file to make updates.
Option 2: Move the “SolveFXUtility.xlam” file to the following folder [C:\Users\[User Name]\AppData\Roaming\Microsoft\AddIns]. To be able to view this folder, you may need to change your File Explorer settings to be able to view hidden items. As new versions of the utility are available, simply copy the new version of the add-in into this consistent location replacing the prior file to make updates.
Launch Excel
Open a new blank workbook
Select the Excel Developer ribbon tab
Select the Add-Ins ribbon option
Select the Browse… button
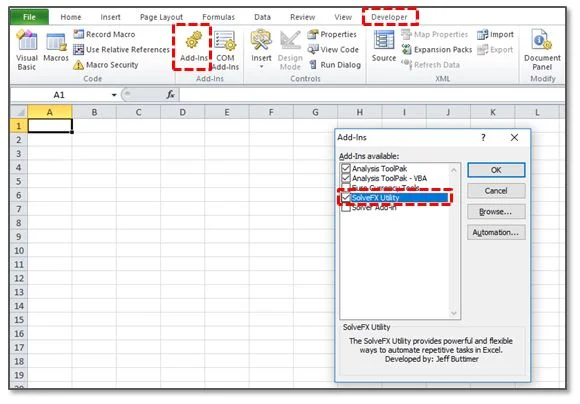
Excel Installation process screenshot
Navigate to the location of the moved “SolveFXUtility.xlam” file
Select the “SolveFXUtility.xlam” file
Click OK
The Add-Ins window will contain a new listing for the SolveFX Utility and should be checked by default. If not checked, check it and click OK.
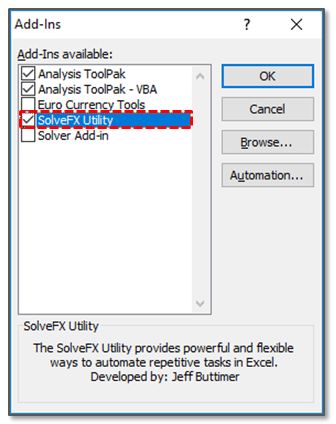
Installation process screenshot
Security Notice
During the installation process, you many encounter the following Microsoft Excel Security Notice. If you encounter this message, you can review the Signature Details and then click on the Trust all from publisher button to proceed. The file path shown in this notice will be the location of the SolveFX Utility Add-In file you saved.
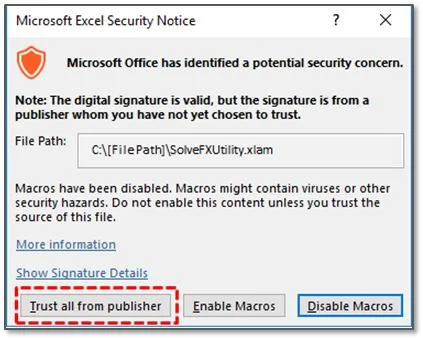
Microsoft Excel security notice
Accessing SolveFX Excel Utility
Once the SolveFX Utility is installed to Excel, a new SolveFX Utility tab will be added automatically to the Excel ribbon each time you launch Excel. To access the SolveFX Utility and its features, at least one unprotected workbook must be currently open in Excel. Select the SolveFX Utility ribbon tab and then select the appropriate feature you wish to use.
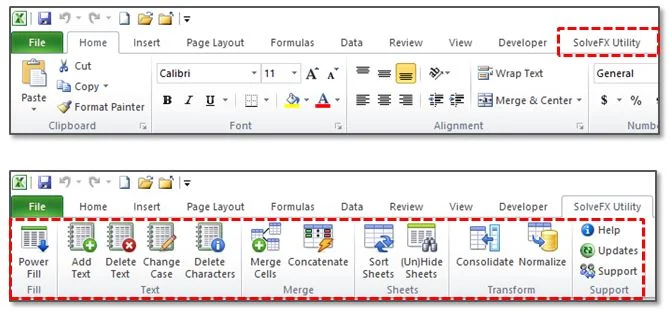
Solvefx utility access within excel screenshot